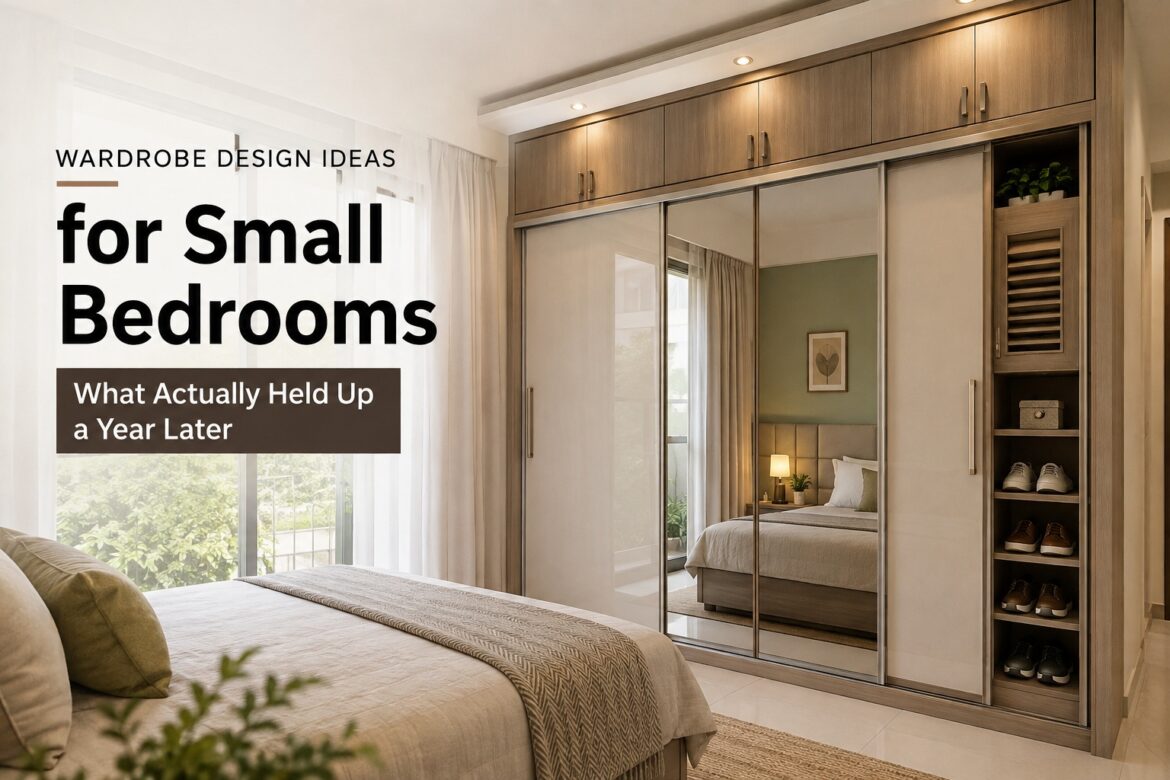
My old wardrobe was one of those hinged, dark-wood units that came with the flat — solid, heavy, and eating up nearly two feet of floor space every time a door swung open. In a bedroom that was already tight, that swing radius meant I couldn’t fully open a suitcase on the floor without moving furniture first. A little over a year ago, I finally redid it. This is what I chose, what actually held up, and what I’d change if I were starting over.
For a small bedroom, a sliding-door wardrobe with vertical storage, overhead loft space and a light or mirrored finish is usually the most space-efficient option. But the right design depends on the available wall width, walkway clearance, ceiling height and how you actually use the storage.
Why I Redid My Wardrobe in the First Place
When I first moved into the apartment, I didn’t think the wardrobe was going to be a problem. It was a solid, dark-wood unit that came with the flat, and from a purely storage perspective, there wasn’t much wrong with it. It had enough hanging space, several shelves and drawers, and it was sturdy enough that I never worried about it falling apart.
The problem was everything around it.
The wardrobe had hinged doors, which meant opening it required a surprisingly large amount of floor space. In a bedroom that was already only about 10 feet by 11 feet, those few extra feet in front of the wardrobe mattered. The unit was positioned along the route to the balcony door, so opening a wardrobe door effectively narrowed the walkway at exactly the point where I needed to move through the room.
I noticed it most in the mornings. I’d open the wardrobe, leave one door open while choosing clothes, and suddenly the usable space between the wardrobe, bed and doorway became very limited. If I had a suitcase open on the floor, the situation was even worse. I would have to move the suitcase or shift something else before I could comfortably open the wardrobe.
That’s when I realized the problem wasn’t actually storage capacity.
It was usable space.
I Didn’t Need a Bigger Wardrobe — I Needed a Better Layout
This distinction changed how I approached the redesign.
My first instinct had been to look at larger wardrobes with more shelves and drawers. But adding storage wasn’t going to solve the problem if the wardrobe itself continued to interfere with the room’s circulation.
Instead, I started looking at the bedroom as a whole:
- How much floor space did the wardrobe actually occupy?
- How much clearance did its doors need?
- Could I use more of the wall vertically?
- Could I eliminate the separate shoe rack?
- Could I store suitcases and seasonal clothes above the main wardrobe?
- Could the wardrobe do more without becoming physically larger?
The answer to most of those questions was yes.
That led me away from simply replacing the old wardrobe with another conventional hinged-door unit and toward a design that used the same wall more efficiently.
The Door Swing Was the Biggest Everyday Problem
The hinged doors were probably the single biggest reason I decided to make a change.
There’s nothing inherently wrong with hinged wardrobe doors. In a larger bedroom, they can actually be very convenient because the entire wardrobe can be opened at once. But in my room, the space required for the doors to swing outward was competing with the space I needed for walking, getting dressed and occasionally moving larger items around.
A sliding-door wardrobe solved that particular problem without reducing the wardrobe’s overall width.
That became my starting point.
Instead of asking, “How much more storage can I fit into this room?”, I started asking:
“How can I get the same or better storage while taking less usable floor space?”
That turned out to be a much better question.
I Also Wanted to Stop Wasting Vertical Space
The old wardrobe stopped well below the ceiling, leaving a sizeable gap above it. That gap wasn’t particularly useful. It collected dust, occasionally became a temporary storage area for things I didn’t know where else to put, and made the wardrobe look like a separate piece of furniture rather than part of the room.
The bedroom has a 9.5-foot ceiling, so there was enough height to do something more useful.
I decided to take the wardrobe closer to the ceiling and use the upper section as loft storage. The things stored there aren’t items I need every morning, so accessibility wasn’t a major concern.
That gave me somewhere to keep suitcases, seasonal clothes and other infrequently used items without adding another cabinet or storage box to the bedroom.
The Redesign Was About Making the Room Easier to Live In
Looking back, the biggest lesson was that a wardrobe shouldn’t be judged only by how much it can hold.
It also affects:
- how easily you move around the bedroom
- whether you can open a suitcase comfortably
- how much natural light the room appears to have
- where you can place the bed and other furniture
- how cluttered the room feels
- how easy it is to access everyday clothes
Once I looked at it that way, the wardrobe became less of a furniture-shopping decision and more of a small-bedroom layout problem.
That’s why I ultimately chose a sliding-door design, added overhead storage and kept the finish relatively light. I wasn’t trying to create the most elaborate wardrobe possible. I was trying to make a small bedroom work better every day.
And, more than a year later, that distinction still feels like the right one.
What I Was Working With: The Actual Space Constraints
My bedroom is roughly 10 feet by 11 feet, with the wardrobe wall measuring just under 8 feet — no built-in alcove, so the unit had to be free-standing against a plain wall. Ceiling height is a standard 9.5 feet, which mattered more than I expected once loft storage came into the conversation.
Small Bedroom Wardrobe Design Ideas That Actually Work
A small bedroom doesn’t necessarily need a smaller wardrobe. What matters more is how the wardrobe uses the available wall, floor and vertical space. After living with mine for more than a year, I found that the designs that worked best were the ones that reduced floor-space demands while making better use of height.
Here are the wardrobe configurations I’d seriously consider for a small bedroom.
1. Sliding-Door Wardrobe
For a bedroom where the wardrobe faces a bed, walkway or balcony passage, sliding doors are one of the most practical options. Unlike hinged shutters, they don’t need additional floor space to swing open.
The compromise is that you can only access one section at a time, and the sliding tracks need occasional cleaning. For my layout, though, saving floor space was more important than having the entire wardrobe open at once.
Best for: Narrow bedrooms, passage-facing wardrobes and rooms where every bit of floor clearance matters.
2. Floor-to-Ceiling Wardrobe
If floor space is limited, look upward. A wardrobe that extends closer to the ceiling can provide considerably more storage without making the room footprint any larger.
In my case, the 9.5-foot ceiling made an overhead loft particularly useful. I use that space for suitcases, seasonal clothes and things I don’t need every week.
The main advantage isn’t just extra storage. A full-height wardrobe also eliminates the awkward gap above the unit where dust tends to collect.
Best for: Small bedrooms with reasonably high ceilings and limited floor space.
3. Wardrobe With an Overhead Loft
A loft doesn’t have to be a separate piece of furniture. It can be integrated into the wardrobe design above the main hanging and drawer sections.
This is particularly useful for items that don’t need everyday access, such as:
- Suitcases
- Blankets and quilts
- Winter clothing
- Travel bags
- Occasionally used household items
The important thing is to reserve the loft for infrequently used items. If you put everyday clothes up there, constantly reaching overhead quickly becomes annoying.
Best for: People who need additional storage but don’t want to increase the wardrobe’s floor footprint.
4. Mirrored Wardrobe Shutters
A mirrored wardrobe doesn’t physically make a bedroom larger, but it can make the room feel more open and brighter by reflecting light and creating the impression of additional depth.
I used mirrored panels on two of my sliding doors, and this made a more noticeable difference visually than I expected.
There is one downside: mirrors show fingerprints and smudges, particularly if children regularly use the wardrobe. If you’re choosing this option, be prepared for more frequent cleaning.
Best for: Small or darker bedrooms where you want the wardrobe to visually recede rather than dominate the room.
5. Light-Coloured or Wood-Tone Wardrobe
Large, dark wardrobes can make a compact bedroom feel visually heavier. A lighter laminate, neutral finish or pale wood tone tends to blend more easily with the surrounding walls.
This doesn’t mean you have to choose an all-white wardrobe. Light oak, beige, soft grey and other muted wood tones can provide warmth without making the wardrobe feel like a large dark block.
I replaced my old dark-wood wardrobe with a lighter finish, and the difference was subtle but noticeable.
Best for: Small bedrooms where a large wardrobe already occupies a significant portion of one wall.
6. Wardrobe With a Dedicated Shoe Section
A shoe section can seem like a minor detail when you’re planning the wardrobe, but it can save valuable floor space.
Instead of keeping a separate shoe rack outside the wardrobe, a dedicated ventilated section keeps footwear contained within the overall storage system. Ventilation is important here; I wouldn’t recommend sealing shoes into a completely closed, unventilated compartment.
Best for: Small bedrooms where a separate shoe rack would obstruct the walkway.
7. Wardrobe With a Compact Dressing Section
If your bedroom doesn’t have space for a separate dressing table, part of the wardrobe can be designed around a small dressing area.
Depending on the available wall width, this could include a narrow counter, mirror and a few drawers for frequently used items. It combines two pieces of furniture into one wall-mounted storage system.
The key is not to make the dressing section so large that it takes away useful hanging or storage space.
Best for: Bedrooms where a separate dressing table would make the room feel crowded.
8. Corner or L-Shaped Wardrobe
A corner wardrobe can make sense when one straight wall isn’t enough for the storage you need. An L-shaped configuration uses two walls and can turn an otherwise awkward corner into useful storage.
However, I’d be more cautious with this design in a very small bedroom. It can increase storage capacity, but it can also make the room feel enclosed if both walls become visually heavy.
For a compact room, I’d consider a corner solution only after checking the bed position, door swing and walking path carefully.
Best for: Rooms with an awkward corner or two usable adjoining walls.
Which Design Makes the Most Sense?
For most genuinely small bedrooms, I would start with sliding doors + full-height storage + an overhead loft. Then I’d decide whether mirrors, a shoe section or a compact dressing area would solve another specific problem.
The important thing is not to add every possible feature. A wardrobe becomes more useful when each section has a clear purpose.
In my own case, the features that survived the one-year test were the least glamorous ones: good hardware, vertical storage, sensible internal organization and keeping the floor clear. Those decisions affected everyday use much more than the finish I spent the most time choosing.
Sliding vs. Hinged Doors: What I Chose and Why
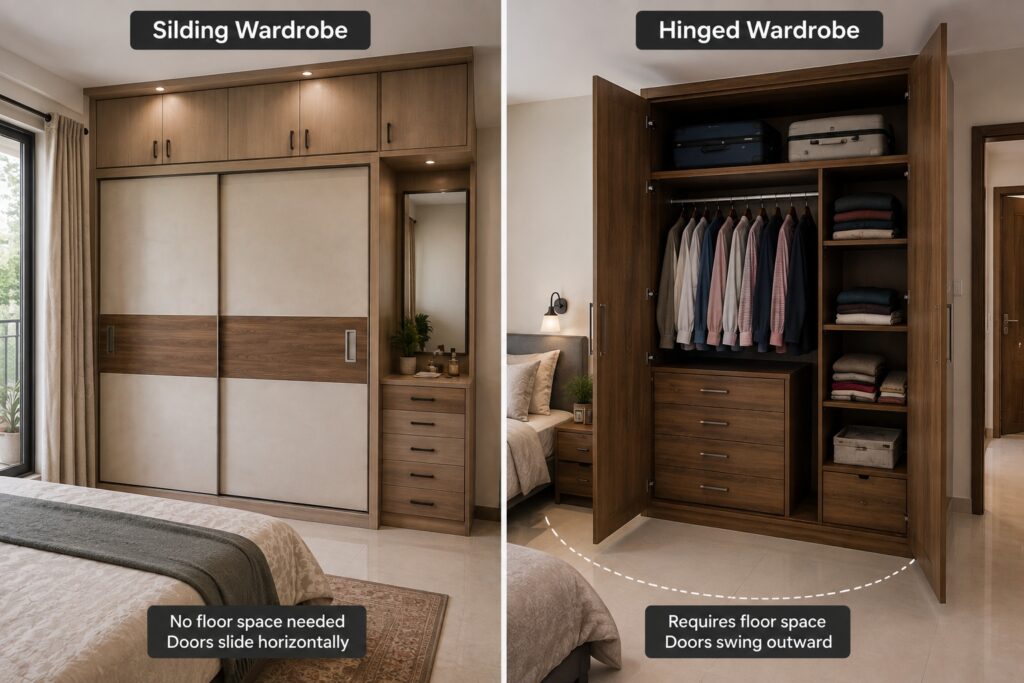
This was the first real decision, and in a room this size, it mattered more than any finish or color choice.
| Sliding doors | Hinged doors | |
|---|---|---|
| Floor clearance needed | None — doors slide along the unit | Requires swing space in front |
| Cost | Slightly higher (track hardware) | Generally lower |
| Access to full wardrobe at once | No — one section at a time | Yes — full unit visible when open |
| Best for | Tight rooms, walkway-adjacent placement | Larger rooms with clearance to spare |
I went with sliding doors, mainly because my wardrobe wall doubled as a walkway to the balcony door. The trade-off — not being able to see the entire wardrobe open at once — turned out to be a non-issue in daily use.
Design Choices That Actually Held Up a Year Later
A few decisions that looked reasonable on the showroom floor turned out to genuinely matter a year in:
- Loft storage above the main unit — used consistently for off-season clothes and suitcases, exactly as planned. The extra 9.5-foot ceiling height made this worth doing.
- A dedicated shoe rack section with ventilated shutters — small addition, but it’s kept shoes out of a separate rack cluttering the floor.
- Soft-close drawer hardware — sounds like a minor upgrade, but a year of daily use later, it’s the one detail I’d insist on again without hesitation. Standard hardware in a rental I lived in before this would stick and rattle within months.
What I’d Do Differently Next Time
Equally honest, a few choices didn’t hold up as well:
- Too many narrow drawers instead of fewer, deeper ones. It felt organized on paper, but in practice I use maybe half of them regularly, and folded clothes get squashed in the shallower ones.
- No internal lighting. The unit sits in a corner that doesn’t get much natural light, and I underestimated how often I’d be digging around in a half-lit wardrobe in the evening.
- A high-gloss shutter finish, which shows fingerprints and dust far more visibly than the matte samples suggested it would.
One Year Later: What I’d Keep vs. Change
After more than a year of using the wardrobe, the things I’d keep aren’t necessarily the features that looked best when it was installed. The practical choices have made the biggest difference in everyday use.
| I’d Keep | I’d Change |
|---|---|
| Sliding doors — They continue to save valuable floor space. | Fewer, deeper drawers — I added too many narrow drawers and don’t use all of them regularly. |
| Loft storage — Ideal for suitcases, seasonal clothes and rarely used items. | Internal lighting — I underestimated how useful lighting would be in a darker corner. |
| Soft-close hardware — Still smooth and quiet after daily use. | Matte finish — The high-gloss shutters show fingerprints and dust more than expected. |
| Ventilated shoe section — Keeps footwear off the bedroom floor. | Better drawer planning — I’d allocate more space to the storage categories I actually use. |
| Mirrored panels — They make the small bedroom feel noticeably more open. | — |
| Light wood-tone finish — Visually lighter than the dark wardrobe I replaced. | — |
The biggest lesson was simple: prioritize the features you interact with every day, not the ones that look impressive in a showroom. Good hardware, sensible storage and efficient use of vertical space have mattered much more than decorative details.
Cost Breakdown: Modular vs. Carpenter-Built
I got quotes for both routes before deciding.
| Modular wardrobe | Carpenter-built | |
|---|---|---|
| Cost (for this size) | ~₹65,000–75,000 | ~₹45,000–55,000 |
| Timeline | 2–3 weeks (factory-made, on-site assembly) | 4–6 weeks (built on-site) |
| Customization | Fixed configurations, limited changes mid-project | Fully customizable at any stage |
| Finish consistency | Factory-finished, very consistent | Depends heavily on the individual carpenter’s finishing work |
I went modular, mainly for the shorter timeline and more predictable finish quality. The carpenter-built option would have been cheaper, but two friends who went that route ended up with longer delays than originally quoted, which weighed into my decision.
Small-Bedroom-Specific Design Tricks That Actually Worked
A few things made the room feel noticeably less cramped, beyond the wardrobe design itself:
- Mirrored front panels on two of the sliding doors — this made the single biggest visible difference to how the room feels, more than any layout change.
- Lighter wood-tone finish instead of the dark unit I had before — a small bedroom with a large dark wardrobe reads as smaller than it is.
- Keeping the unit flush to the ceiling rather than leaving a gap on top, which removed a dust-collecting ledge and made the whole wall read as one continuous piece rather than a separate box.
Key Takeaways
- The wardrobe choices that held up best after a year were the ones prioritizing daily-use practicality — soft-close hardware, loft storage, ventilated shoe sections — over how they looked on install day.
- Sliding doors suited a tight Bangalore bedroom layout better than hinged, mainly due to floor clearance rather than aesthetics.
- Modular wardrobes cost more but came with a shorter, more predictable timeline; carpenter-built options were cheaper but riskier on delivery timing.
- Mirrored panels and lighter wood tones made a noticeably bigger difference to how small the room felt than any layout change did.
FAQ
What is the best wardrobe design for a small bedroom?
There’s no single best design, but sliding-door units with vertical and loft storage tend to work well in small bedrooms since they avoid the floor space a swinging door requires. Mirrored or light-toned finishes also help the room feel larger.
Sliding or hinged wardrobe doors — which is better for small rooms?
Sliding doors are generally better for small rooms since they don’t need floor clearance to open. Hinged doors are cheaper and let you see the full wardrobe at once, but need swing space that’s often in short supply in a small bedroom.
How much does a modular wardrobe cost in India?
For a wardrobe roughly 8 feet wide, modular options tend to fall in the ₹65,000–75,000 range, depending on finish, hardware, and configuration. Carpenter-built alternatives are usually somewhat cheaper but with more variable timelines.
How can I make a small bedroom wardrobe look bigger?
Mirrored shutter panels, lighter wood tones, and keeping the unit flush to the ceiling (rather than leaving a gap) all help a wardrobe — and the room around it — feel less cramped.
Is a carpenter-built wardrobe better than modular?
It depends on priorities. Carpenter-built wardrobes offer more customization and are often cheaper, but timelines can run longer and finish quality varies by carpenter. Modular wardrobes are more predictable in both cost and delivery time.
How much space should I leave in front of a wardrobe door?
For hinged doors, you generally need at least 2–2.5 feet of clearance for the door to open fully. Sliding doors need no clearance in front, which is why they suit tighter layouts better.

Rohini writes about home styling, beauty, fashion, food, and travel from Bangalore, India — drawing on her background in interior styling and years of testing what actually works in real homes and everyday routines. Every recommendation here comes from something she’s personally tried, not aggregated advice.